
This guide will show you how to print a banner (long paper) from Adobe on Mac computers. In this example we will be printing a document that is 36" x 12" in Adobe Acrobat reader.
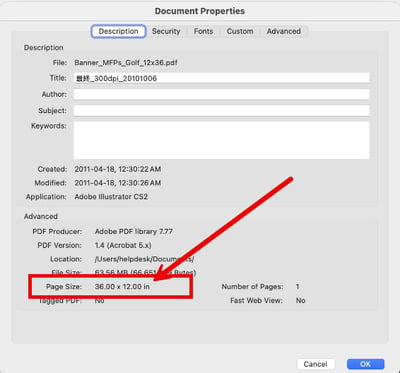
Step 1: Make sure your file is the correct size
This ensures your file is already set to the correct dimensions before printing.
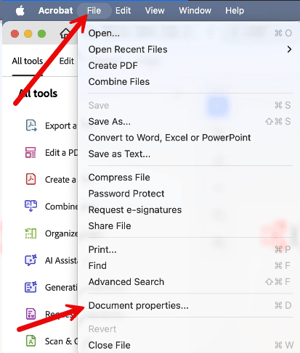
- Go to File then Document properties
- In the Document properties you will be able to see the documents page size
Step 2: Create Custom Paper size
Before printing, you must create a custom paper size on your Mac
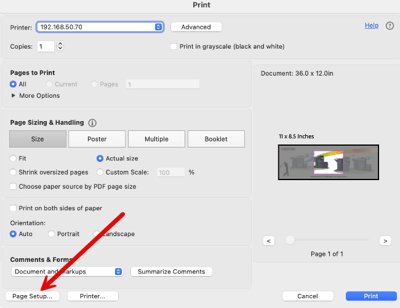
- In Adobe, click Print
- Select Page Setup
-
Click the Paper Size dropdown
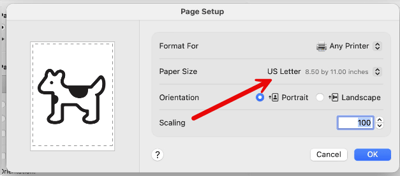
- Select Manage Custom Sizes
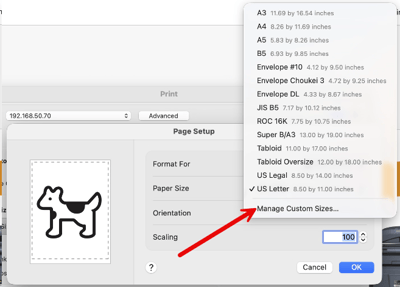
-
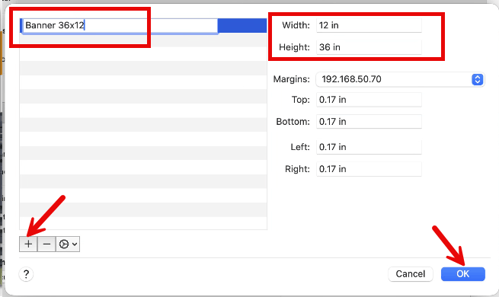
Click the + (plus) button to add a new size
- Now name the paper size and set the Width and Height
- Click OK to save
Step 3: Print
Now you should be able to print your document
-
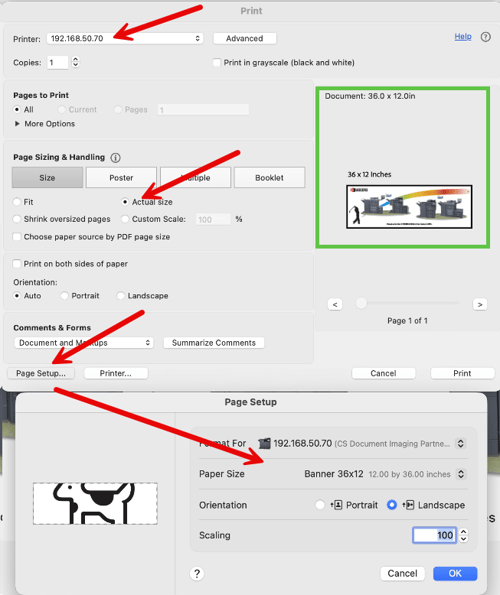
In Adobe, click Print
-
Select your printer
-
Open Page Setup and choose your custom paper size
- Make sure paper sizing and handling is set to Actual size to prevent image resizing issues with adobe
-
Review the print preview to confirm layout and sizing
-
Adjust any additional settings as needed
- Click Print
Step 4: Load paper into MP tray and release print
- Go to the Kyocera printer
- Carefully load the banner paper into the MP (Multi-Purpose) tray
- Support the paper as you insert it to prevent bending
- On the printer screen, press Continue to start printing
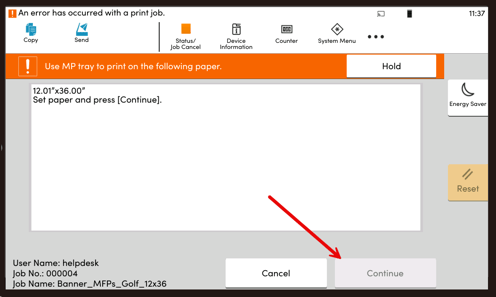
- Continue to support banner paper as it prints to prevent folding or binding on something