
*** PLEASE FULLY READ & COMPLETE EACH STEP CAREFULLY. FAILURE TO FOLLOW EACH STEP IN PROPER SEQUENCE MAY RESULT IN LOSS OF FUNCTIONALITY or IMPROPER DRIVER CONFIGURATION ***
- Double click “Mac56_[Date]-KDC-en.zip”, the files will be extracted into another folder of the same name. Open this new folder.
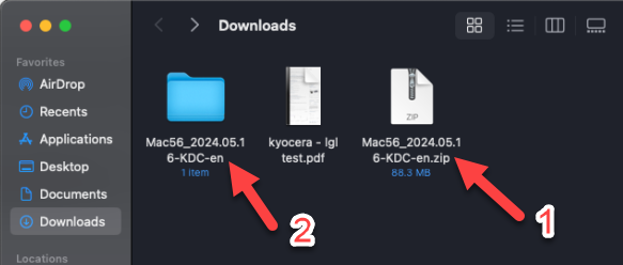
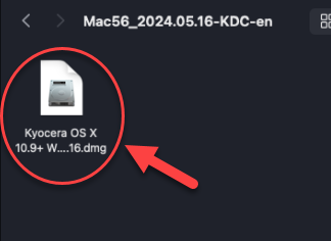
- Double click “Kyocera OS X 10_9+ Web build [version].dmg” from within the extracted folder
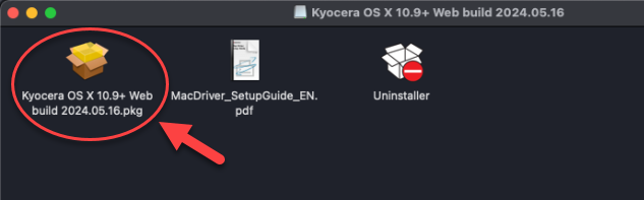
- Double click “Kyocera OS X 10_9+ Web build [version].pkg” to begin the installation
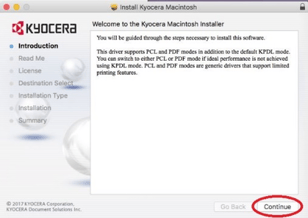
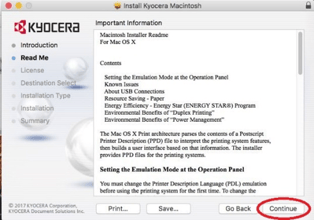
- At the Welcome to the Kyocera Macintosh Installer window click “Continue”, at the next “Important information” window click “Continue”
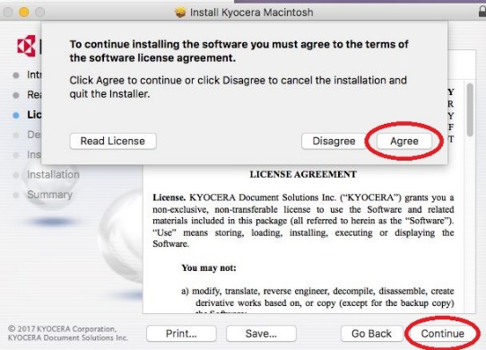
- At the Software License Agreement window click “Continue” and another window will drop down. Here you can read the License Agreement if desired, once you are ready click “Agree”
- At the “Standard Install” window click “Install” (IF PROMPTED enter Administrator password), driver will now be installed
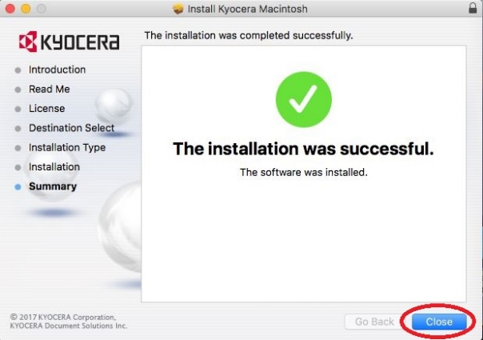
- You should now get “The installation was successful”, click “Close”
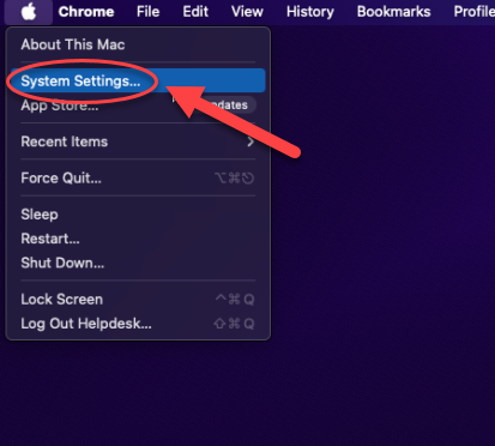
- Click the Apple Icon in the top left, click “System Settings…” then click “Printers & Scanners”
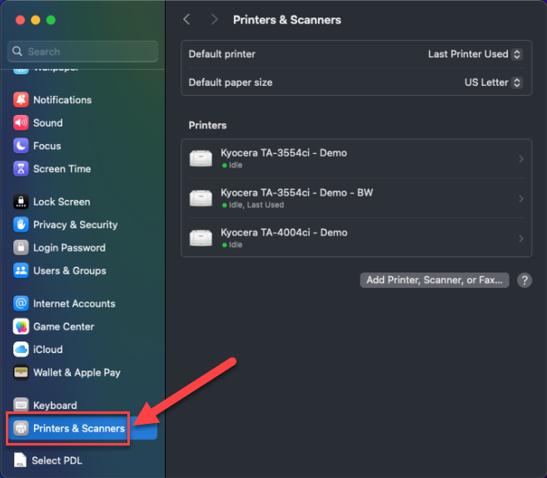
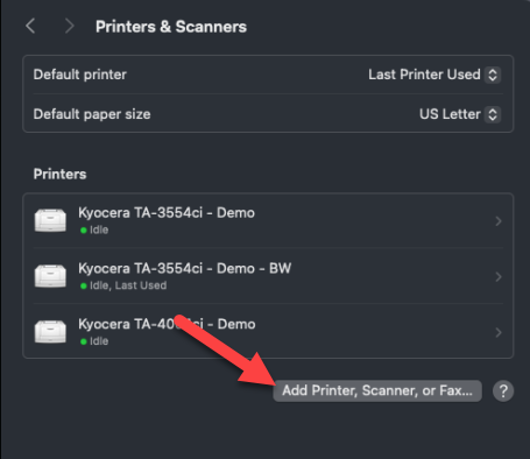
- Click the “Add Printer, Scanner, or Fax…” Button in the bottom right of the Printers & Scanners window.
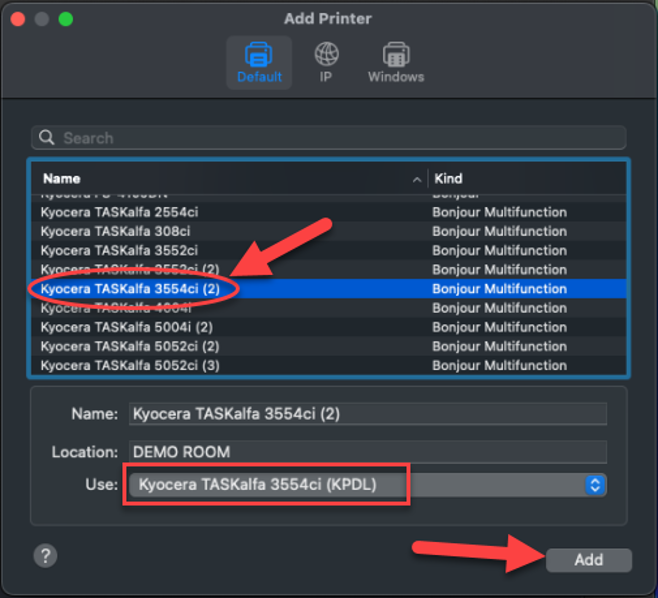
- In the “Add Printer” window, select your Kyocera copier model from the list, at the bottom drop down menu “Use” change from Secure AirPrint to “your model” (KPDL) (see picture below then click the “Add” button
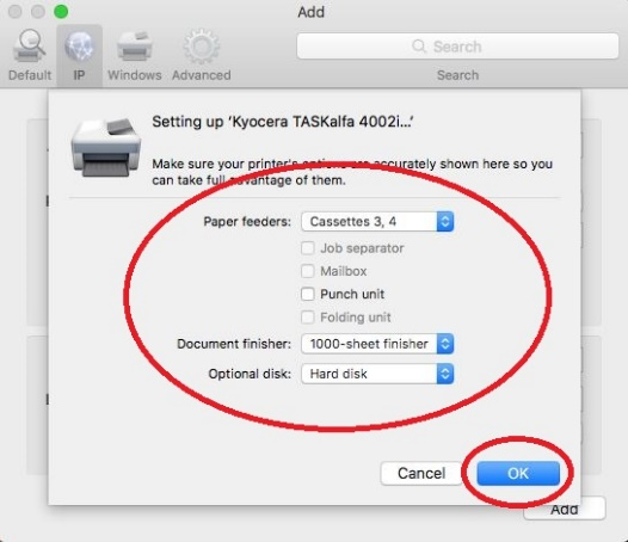
- Select installed options select any installed options (cassettes 3 & 4, paper feeder, document finisher, job separator, etc) then click the “OK” button
*** If your Kyocera copier model is not displayed you’ll need to know the copier’s IP address to proceed with the setup. Ensure your Kyocera device is connected to your network and proceed to Step 12 on Page 5 ***
YOUR KYOCERA DEVICE IS NOW READY TO PRINT
IF YOUR DEVICE DID NOT APPEAR IN THE LIST AFTER CLICKING “ADD PRINTER OR SCANNER” IN STEP 10
- While standing in front of the photocopier….On the copier’s control panel press the “System Menu” button, on the touch screen press “Report”, press “Print Report”, press “Status Page”, press “OK” to print the Status Page. On the Status Page mid-way down on the left side will be “Network”, below that will be “IPv4”, Below that will be “IP Address” (example: 192.168.54.35)
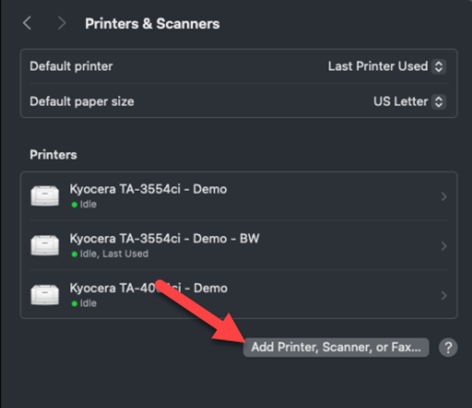
- Click the “Add Printer, Scanner, or Fax…” Button in the bottom right of the Printers & Scanners window.
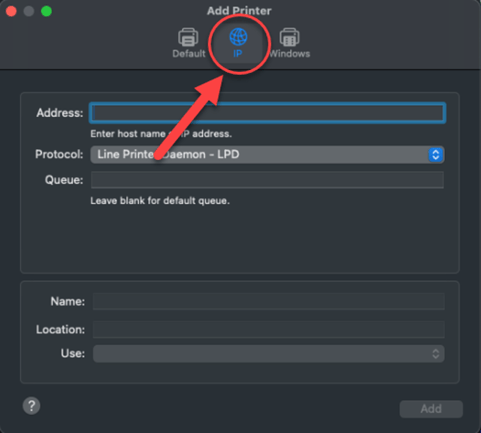
- Click the “IP” button
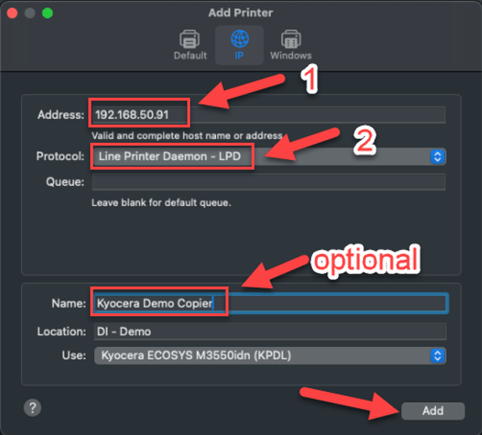
- Enter the Kyocera copier’s IP address and click the drop down menu for “Protocol” to change it to “Line Printer Daemon – LPD”. You will see “Gathering printer information” displayed at the bottom then the model name will be displayed. Change the copier’s name to whatever name you would like it to show up as then click the “Add” button
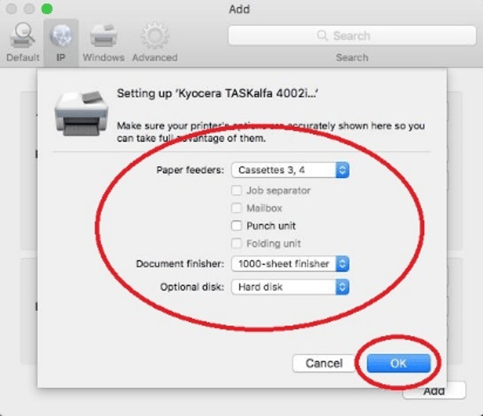
- Select any options installed on your Kyocera device (cassettes 3 & 4, paper feeder, document finisher, job separator, etc) then click the “OK” button
YOUR KYOCERA DEVICE IS NOW READY TO PRINT
How to Configure / Change the settings for your Print Jobs
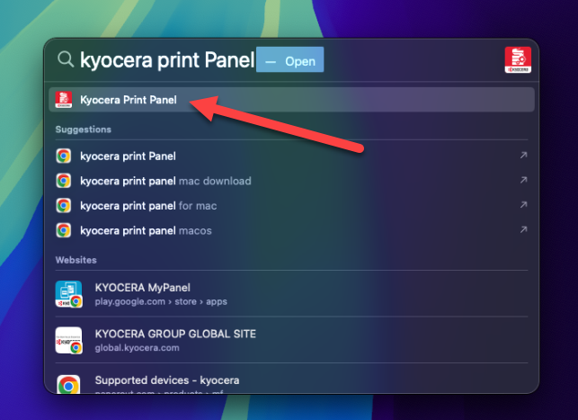
- Select the Magnifying glass icon in the top right corner of your Mac – this will open the “Spotlight Search”.

- Type in and open “Kyocera Print Panel”.
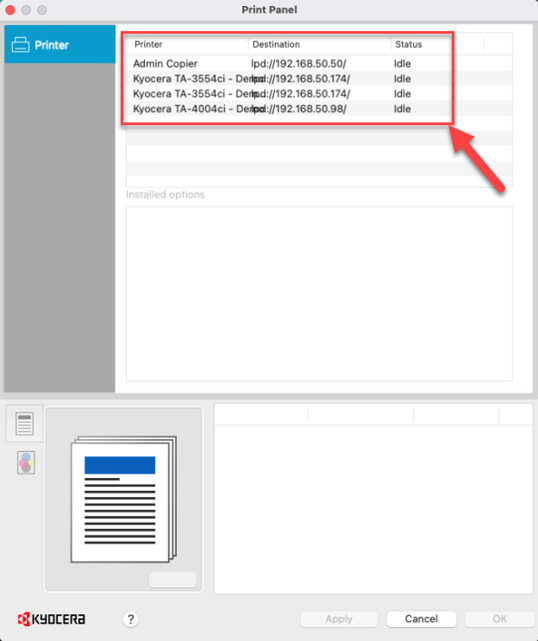
- Select the printer you installed earlier.
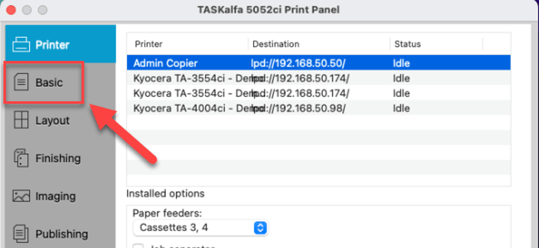
- Select the Basic Tab on the left.
- Change any defaults you wish to have. (pictured: Black and white by default, double sided (duplex) by default, and change Media type to Plain) – Once finished, Select Apply, then OK in the bottom right.
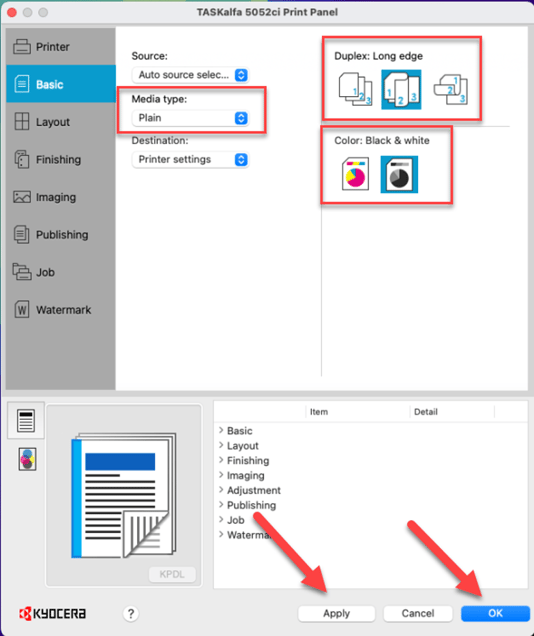
- Once complete – Reboot your Mac – Note: some programs won’t take these defaults like Google Chrome as they have their own built in.