
This guide shows users how to add a Job Accounting code to the Kyocera printer driver so printing can be tracked correctly.
-
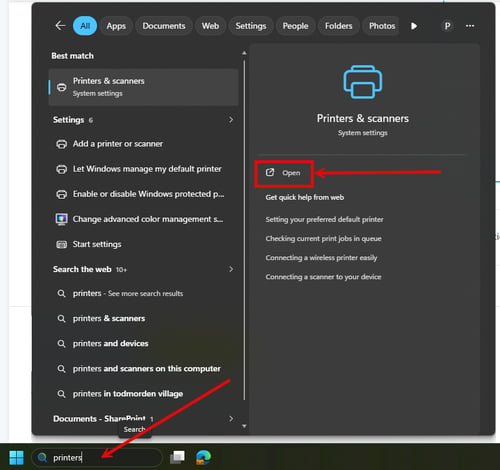
Open the windows Start Menu and Type Printers & Scanners
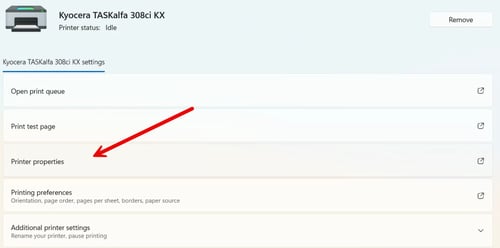
- Click your Kyocera printer and select Printer Properties.
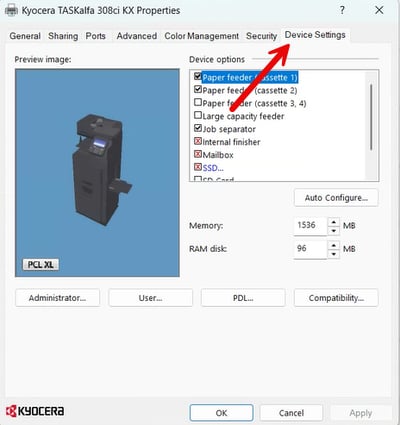
- Click the Device Settings tab.
- Under Job Accounting, check Job Accounting.
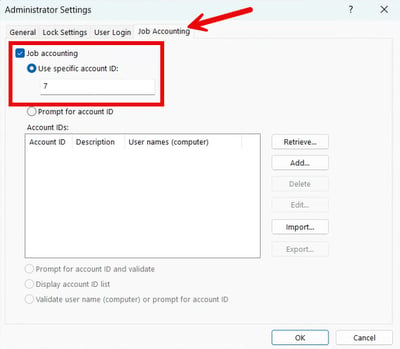
- Enter your assigned Account ID (Job Accounting Code)
- Click OK and then Apply.